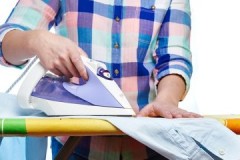
With or without arrows: how to iron a men's long-sleeved shirt
 An elegant long-sleeved shirt is often included in the wardrobe of both men and women. High-quality washing and ironing gives the product an attractive look.
There are certain rules how exactly should a shirt be ironed with long sleeve. Sticking to them will make it easy to look neat and neatly dressed.
Let's take a closer look at how to iron a long-sleeved shirt for men so that no arrows form on them.
Content
Preparing for ironing
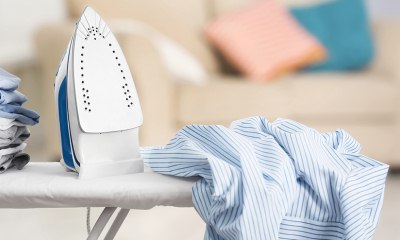 Before proceeding directly to ironing, it is necessary to prepare the product itself and all the necessary accessories.
To iron comfortably, you need to properly organize your workplace.
It is important to first examine the label for the product., which indicates the manufacturer's recommendations for care. As a rule, the recommended ironing temperature is mentioned on it.
The temperature setting is schematically indicated on the label by dots. The appropriate mode will need to be set on the iron prepared for ironing the shirt.
If an ironing board is not available, a regular table can be used, but first you have to cover it with a dense, non-fading cloth.
How to do it right: step by step instructions with a photo
Ironing a men's shirt correctly is more difficult than it seems at first glance. The shirt must be properly washed and dry.
It is necessary to inspect the shirt itself and perform such actions:
- If there are special plastic parts in the corners of the collar to help keep it in shape, they must be pulled out. But it is more correct to do this even before washing.
- Unfasten the buttons.
- Make sure that the item does not require repair - all buttons are present, there is no damage.
If the shirt is completely dry, and even dry, it can be evenly sprayed with water from a spray bottle and left in a plastic bag for a quarter of an hour.
Collar processing feature
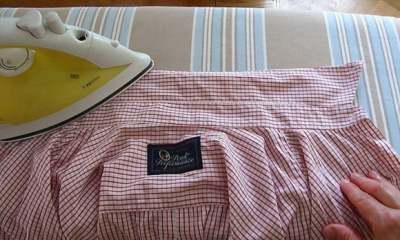 The collar is laid out with the wrong side up. It is ironed by moving the iron from the edges to the middle.
Carefully need to handle:
- place along the strap and around the top button;
- an eyelet for the top button.
After that, the thing is turned over and the collar is ironed on the front side. For materials difficult to iron, the steam function can be used.
If the shirt has clamps at the corners of the collar, insert them and gently iron them. Do not smooth the fold of the collar.
Cuff
After the collar is ironed, go to the cuffs:
- They are laid out seamy side up on the ironing board.
- Iron in the direction from the corners to the central part.
- Turn the part over to the front side.
- Iron with effort from the corners.
- For cuffs that fit cufflinks, align both eyelets and iron them together.
Sleeves
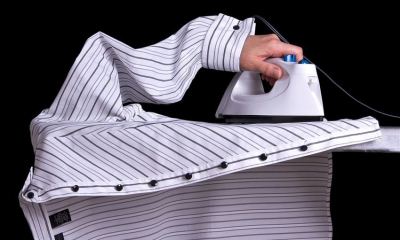
After processing the cuffs, the rest of the sleeve is ironed. To do this, first one sleeve of the shirt is processed, and then the second:
-
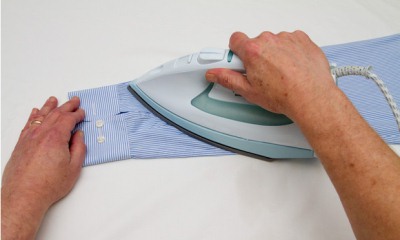 The part is turned seam up. Iron, pulling and straightening the material so that no arrows or creases are formed.
In this case, the iron should no longer touch the cuffs, not reaching them one or two centimeters. Also leave for later processing the seams from the side of the armhole.
- The sleeve is turned over, the central part is ironed. Turn the piece over again, and put it on the armlet, starting from the cuff.
- Ironing begins at a distance of 20 mm from the cuff.
- Smooth the bar on one side, and then on the other side.
- Fastened buttons at the cuffs.
- Iron the strap with a fastener.
Alternatively - tightly rolled towels... In the same way, the armband can be replaced, for example, by a duvet cover or other material that is neatly folded and then rolled into a roll.
Shoulder and yoke
After the collar and sleeves have been ironed, the shirt is put on the ironing board from the narrower end so that it is convenient to iron the shoulder section.
Then they move on to ironing the collar joint with the shirt, and the seams on the armholes. When ironing the shoulder seams, the collar should not fall under the iron again.
Shelf
Start processing the shelves from the one on which the buttons are located... The shirt shelf is laid out along the ironing board so that the shoulder is on the narrowed side of the ironing board.
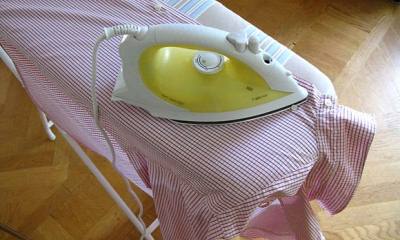 Shelf processing:
- straighten the fabric;
- near the buttons, the iron should be moved carefully, trying not to touch them;
- the iron is moved from the bottom up;
- after the iron spout has ironed part of the shelf near the collar, the device is moved to the lower edge of the product;
- repeat processing on the second shelf.
If the bar is rigid and multi-layered, it is recommended to iron this part first from the inside out, and then from the face.
Backrest: "home stretch"
The back and side seam is much easier to iron. To do this, place the product on the ironing board so that the shoulder seam is on the side of the narrow end of the ironing board, and the bottom edge is on the side of the wide end. It is recommended to stretch the side seam slightly during the smoothing process..
The step-by-step process of ironing a men's shirt is presented in the video:
How to iron without iron?
Sometimes there are situations when it is not possible to fully iron a shirt with a sleeve. Universal ways how to iron a shirt without an iron, no, but there are easy methods on how to get a good enough result:
- One of the options to do without an iron is to turn off the "spin" mode when washing in the washing machine. In this case, the product is taken out when wet, hung on a hanger over a bathtub or other container, and the water is allowed to drain.
- The crumpled shirt is lightly sprayed with water from a spray bottle. Until she had time to dry, they put on the body. Drying directly on the person, the fabric straightens.
Steamer and steam generator
At home, ironing a shirt is possible not only with an iron, but also with other equipment: a steamer and a steam generator. Before using this or that device, it is recommended to study the instructions for it.
Popular machines for smoothing shirts include the following:
-
 Steam generator... At its core, this device resembles the operation of an iron. The principle of operation is to steam things with a powerful jet of steam.
At the same time, dry steam is able to cope even with a very wrinkled shirt with a sleeve.
- Steamer... It is especially effective on loose fabrics. The impact on the shirt occurs with hot steam, straightening even complex creases and folds.
- Steam dummy... This device is an inflatable dummy, similar to a human torso. This is a professional device that helps to deal with not only wrinkled shirts, but also other items of clothing. In everyday life, a steam dummy is not used.
6 tips on how not to spoil a thing in the process
Iron the shirt well with sleeves simple tips will help:
- Before you start processing the product, you need to study the label.
- If there is no label indicating the ironing mode and unknown fabric composition, the iron must be set to the minimum temperature mode. If necessary, the temperature can be increased carefully.
- It is necessary to gently iron the fabric near the buttons, as upon contact with a heated surface, the plastic may melt, deform and even damage the product itself.
- It is recommended to immediately hang the ironed item on a hanger so that it does not jam.
- If the shirt has a print, iron it from the wrong side or through a special fabric.
Conclusion
A well-ironed long-sleeved shirt is a versatile item of clothing that emphasizes the image. Once you have mastered the ironing process, it will go faster than the first times.

