Several proven ways to remove scratches on the bathtub
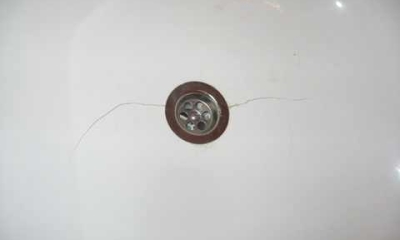 All kinds of damage to the bath bowl spoil not only the appearance of the plumbing, but also create inconvenience during operation. Therefore, the emerging scratches, chips, cracks must be repaired in a timely manner.
The restoration is carried out in different ways, depending on the nature of the defect and the coating of the bath. We will tell you about how to remove scratches on the bathtub in the article.
Content
How to remove shallow damage?
Even small thread-like damage that does not reach the metal must be immediately eliminated, since dirt, microorganisms get into them, and the process of destruction of enamel or acrylic increases.
To restore the coating, a simple technology is used:
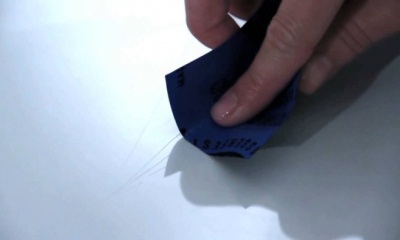 The walls, bottom, sides are thoroughly washed with a suitable cleaning agent, rinsed the surface. Wipe clean with a dry cloth or let it dry naturally.
- Grind the area with a fine sandpaper or a screwdriver with an abrasive disc until the surface is dull.
- Apply a fine-grained polish to the bowl. Using felt, the surface is rubbed first in the horizontal direction, then in the vertical direction.
- The surface is polished with a soft wax polish. The treatment is carried out with a soft cloth until the coating becomes smooth and shiny.
- Finally, the bath is washed with a gel or liquid foaming agent and rinsed.
It is recommended to use lint-free cloths for polishing. Will fit:
- microfiber,
- felt,
- cotton,
- flannel.
How to repair chips?
Broken-off areas of the bath require special sealing methods. Suitable for this:
- making a porcelain patch;
- pouring BF-2 glue with pigment;
- sealing with putty and enamel;
- restoration with enamel.
Training
The end result largely depends not only on adherence to technology, but also on the thoroughness of preparation. This stage of work includes the following steps:
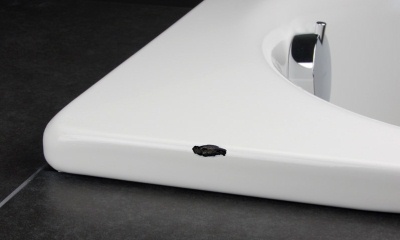 The damaged area is cleaned and degreased with soda powder, Pemolux or other cleaning agent.
- The chip is ground using a drill with abrasive nozzles. This will improve the adhesion of the mastic to the substrate.
- The bath is rinsed and the treated surface is dried using a hot hair dryer.
- The dry area is degreased with acetone, alcohol or thinner, and then primed.
The primer lays down in a more even layer and enhances the adhesion of the material if the treated area of the bath is heated before applying it.
Making a porcelain patch
You will need any unnecessary or broken china and epoxy to work. When choosing porcelain, you should carefully select the color: it should match the shade of the bath as much as possible.
Repairs are carried out sequentially:
- Porcelain is ground into a fine-grained powder.
- A layer of epoxy is applied to the split area.
- Sprinkle the resin with porcelain powder.
- Give the time required for the instructions to set.
- After 2-3 hours, the deep cleavage is again covered with epoxy.
- Repeat sprinkling with crumb and incubate until hardened.
- Polish the area with fine sandpaper.
Pouring glue BF-2 with pigment
The tool, known by this name, contains polymeric substances. They create a hard, durable but transparent patch on the surface of the chip. So that it does not differ in color from the bath, pigment additives are used.
It can be:
- dry whitewash;
- dentifrice;
- crushed chalk.
The repair process is as follows:
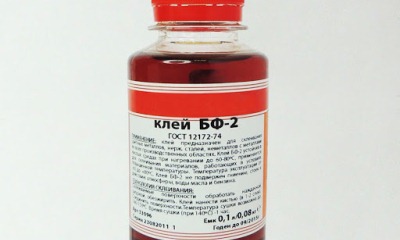 A small amount of pigment is added to the glue, the mass is mixed.
- Apply a white adhesive to the recess.
- Maintain a layer of glue on the bath for a day.
- A small amount of glue is added if necessary.
- The new layer is also allowed to dry completely.
- Polish the repaired area with the finest sandpaper.
A multilayer coating made of BF-2 glue must dry for at least 72 hours.
Sealing with putty and enamel
You can remove a chip on a font using automotive putty and car enamel. These materials are resistant to water, temperature extremes, mechanical stress.
The work does not require special skills:
- putty is applied to the prepared split-off area;
- distribute the mass so that no bubbles remain;
- level the surface of the patch with a paint spatula;
- wait until the material is completely dry;
- polish the area with fine sandpaper;
- paint the hardened mastic with enamel.
Enamel restoration
This is the least time consuming method. However, it does not guarantee a perfectly flat surface. To work, you must have enamel for restoration. It is made from synthetic resins. You can find such a tool in plumbing stores.
This method is more suitable for fresh and small lesions.... In this case, it provides a long-lasting and long-lasting bathtub coverage.
How to repair chips on the surface of the bathroom, the video will tell:
How to cover cracks?
If a through defect has formed on the bowl, due to which water began to seep onto the floor, special repair methods must be used. In different situations, experts offer a choice of three options.
 But in each case, preliminary processing is necessary:
- Rinsing the bath with a cleaning agent.
- Anti-rust treatment if necessary.
- Grinding the entire area with an abrasive nozzle.
- Expansion of the crack along its entire length.
- Degreasing the area with a defect.
Abrasive cracks should cover the adjacent edges 1-2 cm wide.
Cold welding
Retaining holes of about 3 mm are made at both ends of the split. They should not be cross-cutting. Sometimes it is enough to perforate only one side. Such a measure is needed to stop the longitudinal propagation of the defect.
After all the preparatory work the crack is poured with cold welding and kept for 24 hours... For the sake of aesthetics, the repaired area is covered with enamel on top.
Epoxy patch
After degreasing, the extended groove is filled with epoxy. Place a piece of fiberglass on top, matching the size of the crack, and apply the resin again.
After drying, these steps are repeated. Eventually you should get a patch that rises above the surface the rest of the bowl.
Sealing
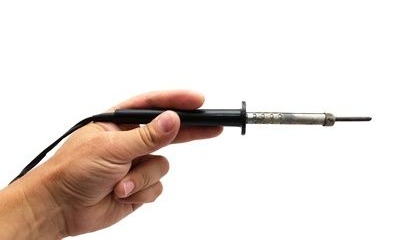 This method is suitable for metal baths. Previously, enamel is removed at the problem area, exposing the base of the bowl.
Further work is carried out using a soldering iron and lead-tin solder... The seam and the area around it are covered with enamel.
Sealing the crack gives a shorter lasting result, but can be used as an express method.
Features of repair depending on the material of the container
Plumbing can be made from different materials... Cast iron and steel containers are covered with enamel, which gives the font an aesthetic appearance and protects the metal. An acrylic bathtub has a homogeneous layer made of a special type of polymer plastic.
Each type of material requires compliance with its own repair features.
Cast iron
The restoration of the enamel coating of such a bowl depends on the extent and depth of the damage. Small scratches can be easily removed by sanding and polishing. To do this, use the standard method described above.
The preparation algorithm consists of the following steps:
- The problem area is cleaned with special products. For this, Surzha or Chistin Sanitary is suitable.
- Deep damage is treated with oxalic acid or other powerful anti-rust compound.
- The selected agent is applied directly to the metal, held for 15 minutes, then washed with water.
Acrylic
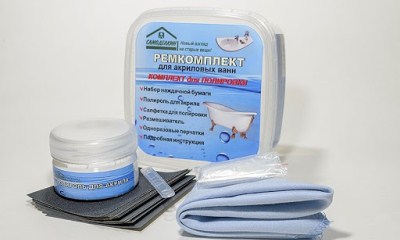 The easiest way to repair acrylic plumbing is to purchase a special repair kit. It includes:
- instructions;
- a set of waterproof sandpaper;
- polishing paste;
- acrylic reducer;
- polishing cloth.
It is convenient to use an acrylic pencil to putty small scratches. The line-corrector has a thin brush with which it is convenient to apply the product. This method also requires subsequent grinding and polishing.
If, as a result of unsuccessful operation, a hole has formed in the acrylic bathtub, then it is closed with fiberglass and epoxy glue. The work is performed using crack repair technology.
What cannot be used?
There are some limitations to keep in mind when restoring. To handle damage, you cannot use:
- Strong acids or acidic preparations. They can further damage the enamel and metal base of the bathtub.
- Coarse grinding attachments. Their use can lead to thinning of the walls.
- Acetone solvents for acrylic baths. Such compositions lead to clouding of the plastic and the plumbing fixture loses its beautiful appearance.
Additional Tips
To prevent the appearance of defects, as well as to effectively remove them, you should remember about preventive measures and recommendations for repair:
- When cleaning the bowl, do not use abrasive products or coarse brushes as they tend to scratch.
- When bathing animals, lay a polyurethane or cloth mat on the bottom of the bath.
- It is recommended to protect plumbing fixtures from sharp and heavy products, impacts of which lead to splits and cracks.
All the most important and useful information about bathroom cleaning is collected in this section of the site.
Related videos
How to restore bathroom enamel, the video will tell you:
Conclusion
There are different ways to eliminate scratches, chips on the surface of an enamel or acrylic bath. To remove defects, use:
- grinding,
- polishing,
- covering the bowl area with a special putty,
- epoxy resin,
- enamel,
- glue.
Through cracks require additional drilling and patching with glue and fiberglass. If all instructions are followed, it is easy to restore the integrity of the bowl and continue its operation.

